How do I create and set up an Enterprise Scheduling Page?
Overview
Book more meetings with ease by letting the attendee choose the date and time from your Enterprise Scheduling Page— a shareable web page that shows your availability which you can customize to your needs. Learn more here.
To create and set up your Personal Scheduling Page, follow the steps below.
Requirements
The Enterprise Scheduling Page feature is supported in the locally-installed version of Cirrus Insight for Outlook (as opposed to the web-installed version). If your Cirrus Insight Settings show up on the left side of your Outlook Home ribbon, you're good to go. If they're on the right side, though, you'll need to first install this version.
Steps
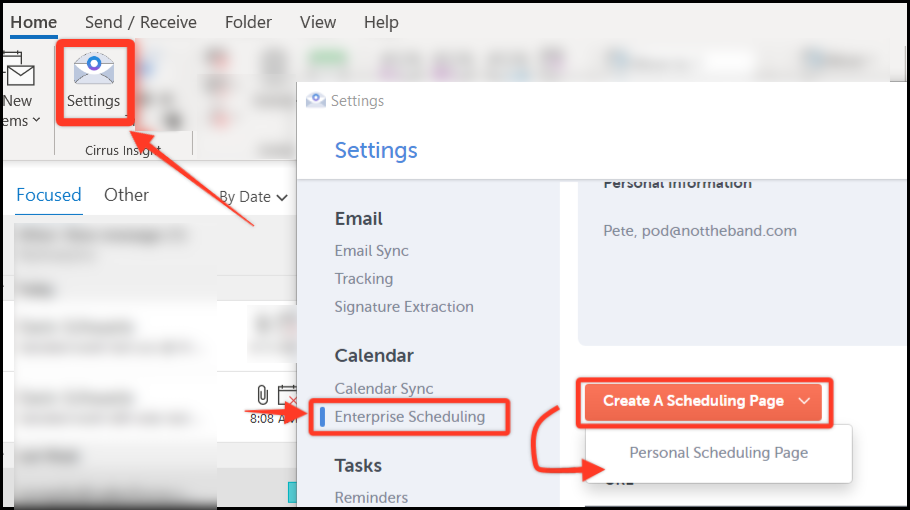
1. Open Cirrus Insight Settings from the Outlook Home ribbon.
2. Select Enterprise Scheduling from the lefthand menu.
3. Click Create a Scheduling Page and then choose Personal Scheduling Page.
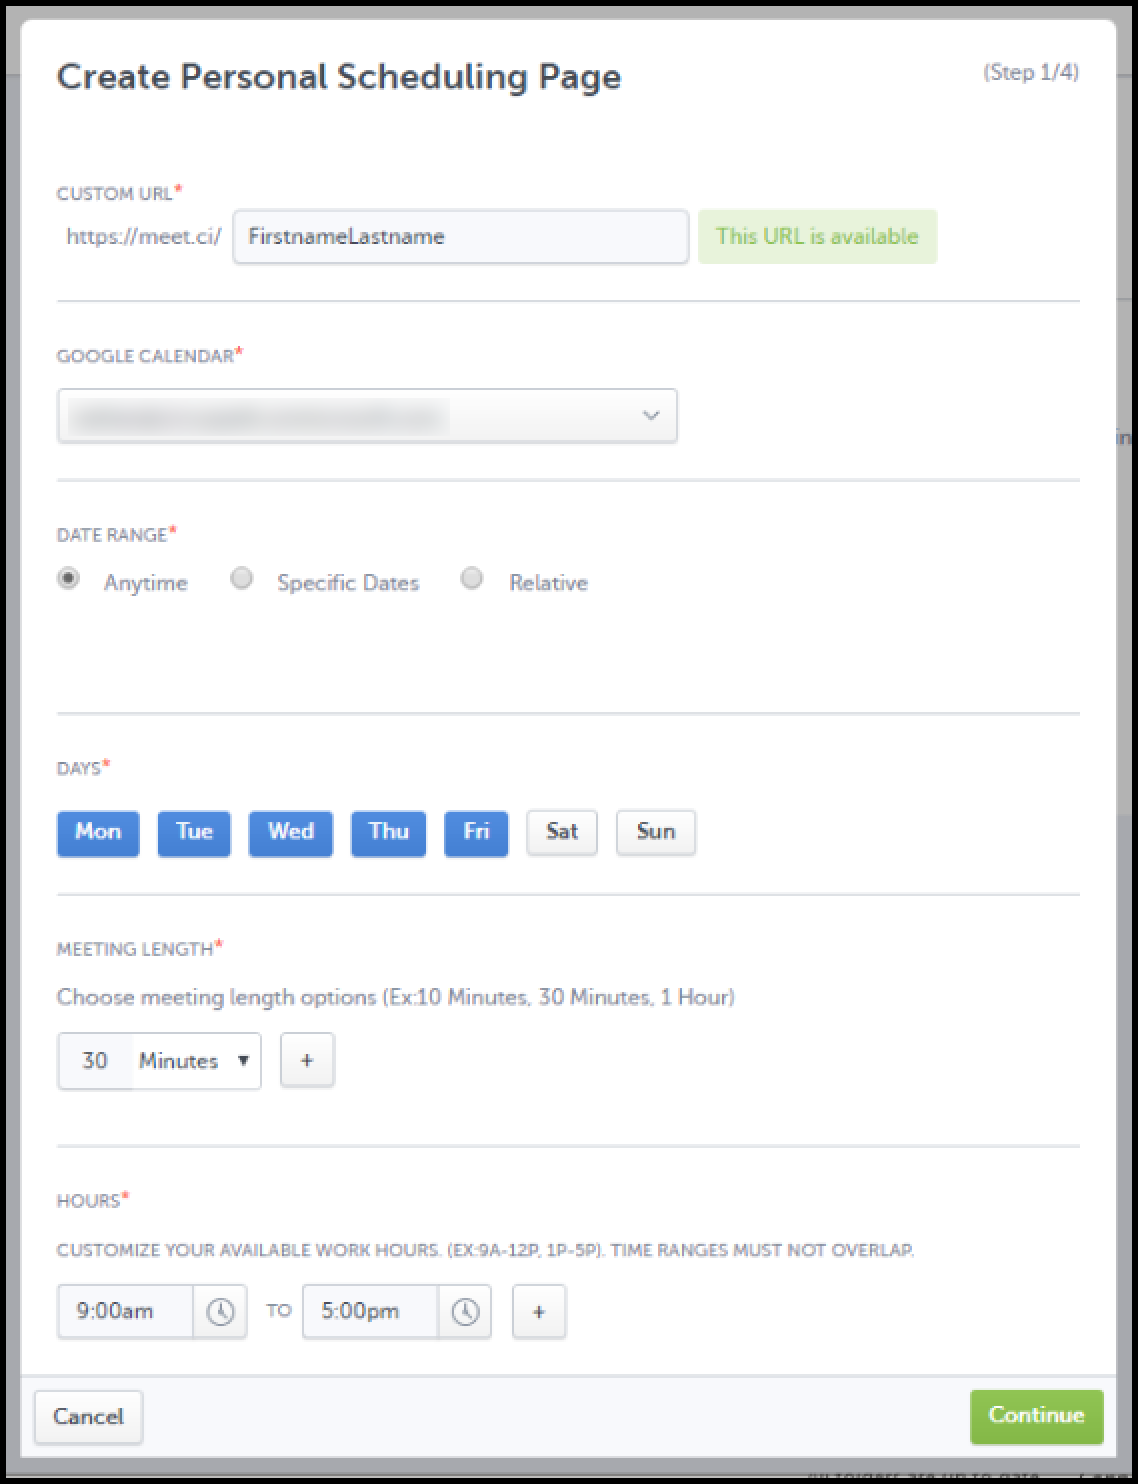
4. From the the setup wizard, create your custom URL and select your Outlook calendar, which will import your free/busy times.
Adjust the date range and days of the week that attendees can schedule meetings. Then choose a standard meeting length and available work hours.
Click Continue.
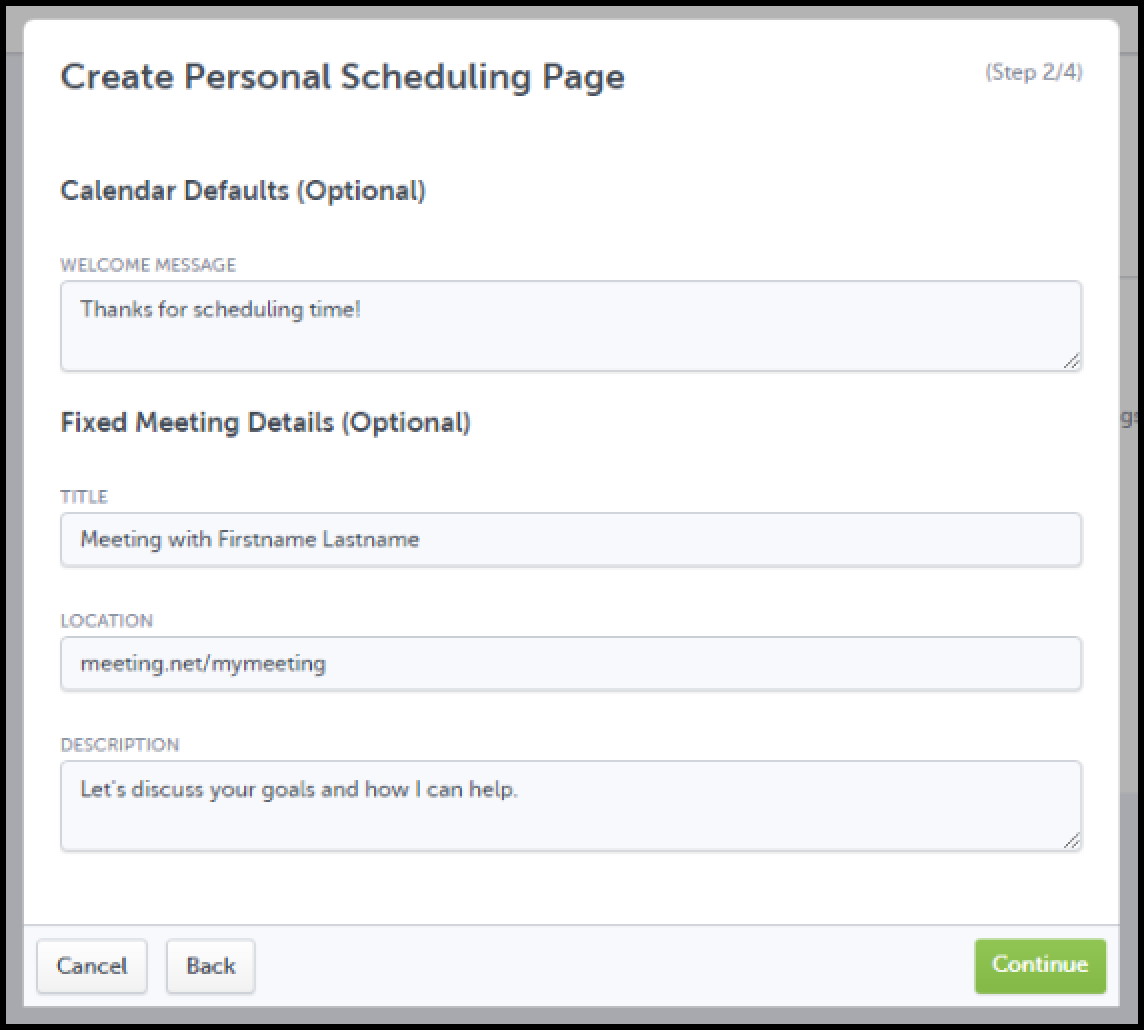
5. Optionally, you can include a welcome message and fixed meeting details (title, location, and description).
Click Continue.
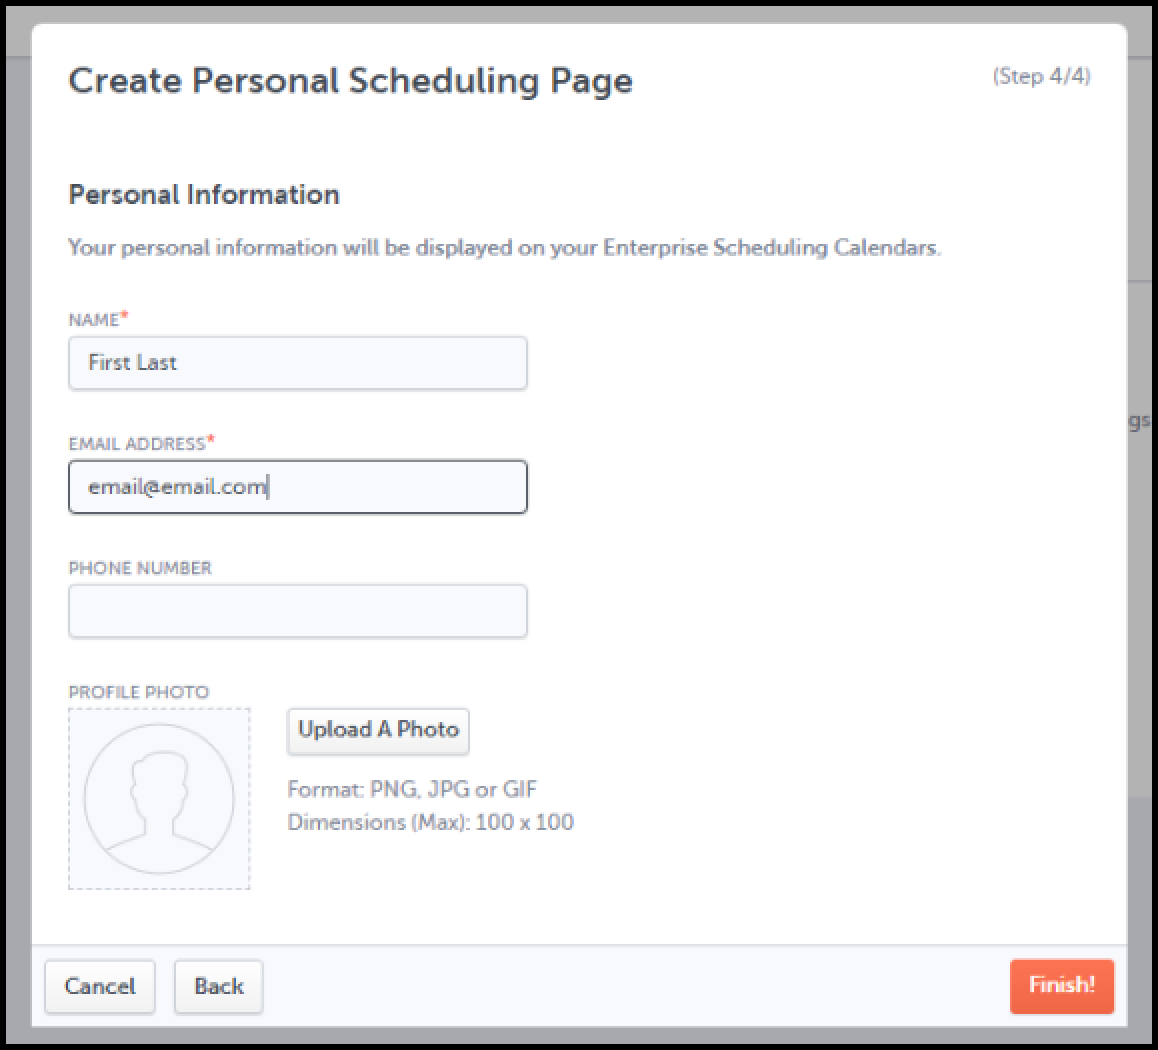
6. Add your Name and Email Address. Optionally, you can include a Phone Number and Profile Photo.
Click Finish.
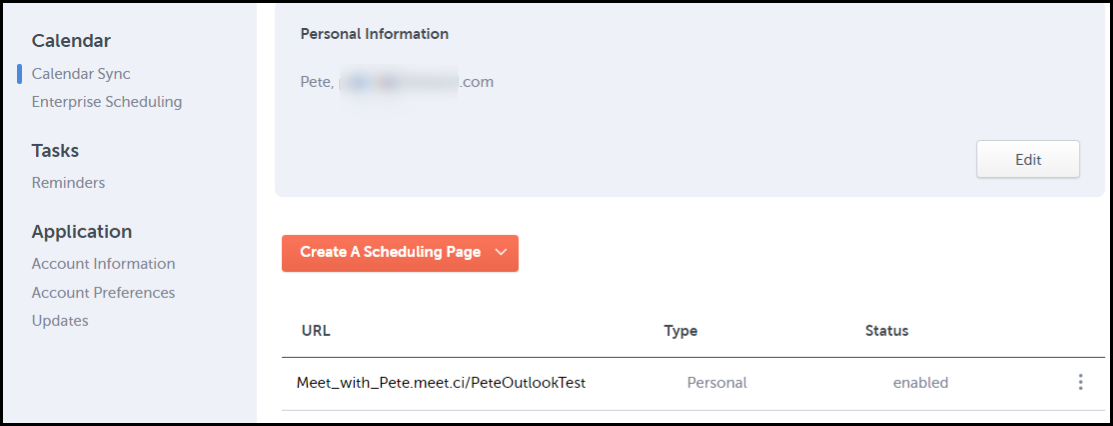
7. After creating, review and edit your Enterprise Scheduling Page from Cirrus Insight Settings. From there, you can create more pages, edit URLs, or change settings.
Updated Dec. 2020
Related Articles
-
How do I invite multiple attendees to a meeting?
Learn how to easily add multiple people to a meeting invitation using the Book Meeting feature.
-
How do I add Salesforce parameters to my Personal Scheduling Page link?
When sending out your Personal Scheduling Page link to a specific recipient, you can edit the link so that the event will be added to Salesforce and related to the contact (and one other record) after the recipient selects a time.
-
How do I invite multiple attendees to a meeting?
Learn how to easily add multiple people to a meeting invitation using the Book Meeting feature.
-
How can I schedule meetings for my coworker using Book Meeting?
Book Meeting supports shared Google calendars so you can easily book meetings between clients and coworkers.
-
For Admins: How do I set up company branding for my team's Personal Scheduling Pages?
Admins can see how to quickly customize their team's branding for user's Personal Scheduling Page.